When you have a single contact associated with a deal, that contact's information will be pulled into Paycove to display in various locations. The contact is also set as the default recipient of invoices and other emails. Simple enough, right?
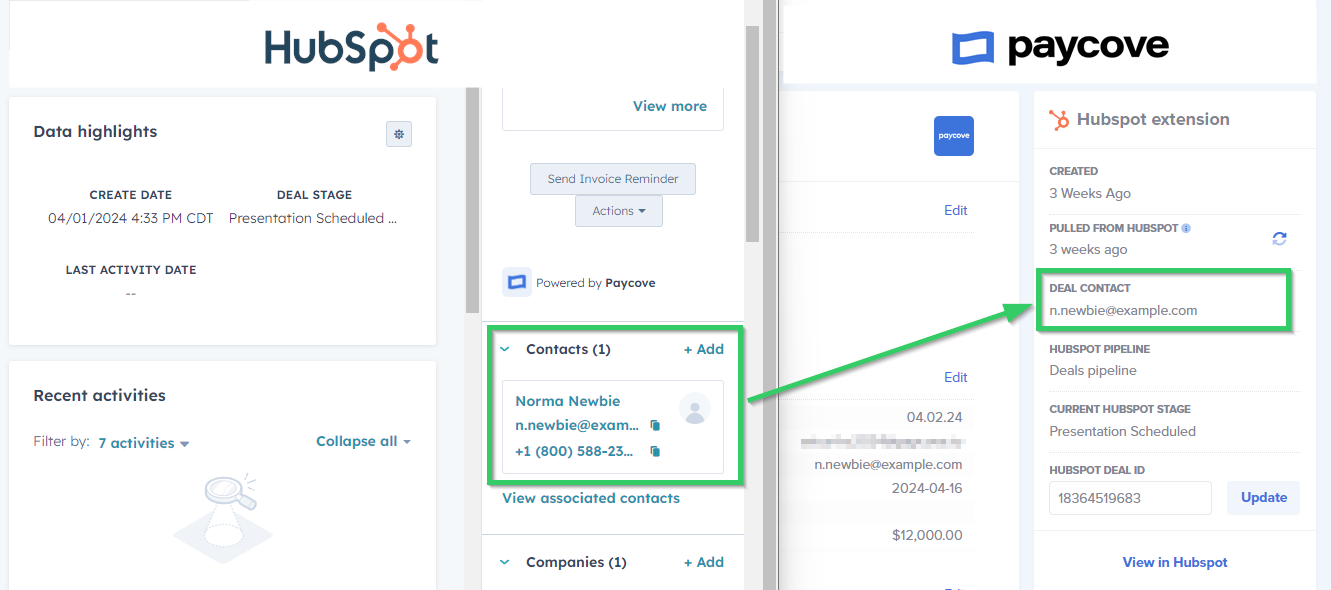
But what about when you have multiple contacts associated with a deal? How can you tell Paycove which contact is the primary individual you want connected to the invoice? Well, the good news is that you can accomplish this without fuss by creating a label for your primary contact using HubSpot's association labels feature, which we've integrated with. In fact, you can make labels for each of the contacts associated with a deal. (According to HubSpot, you can actually create up to 50 labels for associations between each object pair, such as 50 labels for contacts and deals, 50 labels for companies and contacts, etc.).
Creating and Setting an Association Label
Creating Your Label in HubSpot
First, you'll need to create the label itself. We will be using the word "Prime" in this walkthrough. Note that you can technically use any phrase, as long as it matches what you'll eventually type in Paycove. It is not case-sensitive.
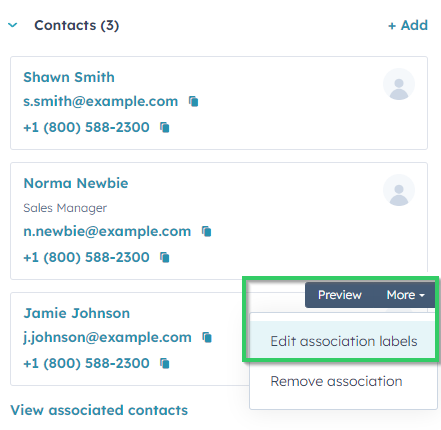
To access the association labels page, open your deal, hover over the desired contact in the right sidebar, and click More > Edit association labels, as shown below. Remember this spot, because you'll need to come back here in a few minutes after creating your label.
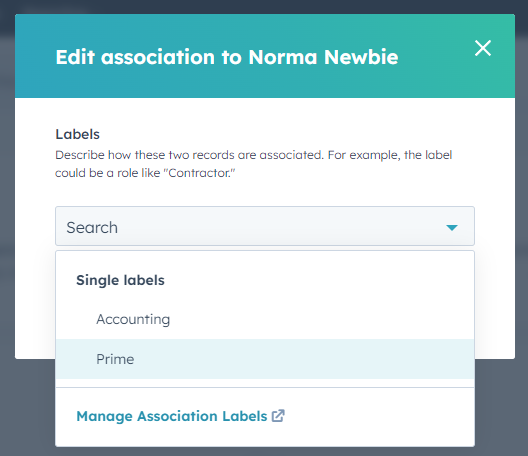
A modal will open where you'll click the blank dropdown, and then Manage Association Labels. You should be taken to the page shown in the image below.

Note: You can also access the association labels page by navigating to Settings > Objects > Contacts > Associations. This will take you directly to the page.
Here, you'll create your label by clicking the Create association label button, selecting your settings, and typing in your desired phrase, e.g. Prime. You are free to copy our settings shown in the image above, which are fairly straightforward.
Setting Your Label in HubSpot
Now that the label has been created, you'll be able to assign it to your desired contact. This time when you hover over the contact and click More > Edit association labels, you'll see that your phrase appears in the dropdown. Select your phrase and click Update.
Note: Assign the Prime status to one contact only for the feature to work properly. If you accidentally assign this to multiple contacts, or would like to change the contact, you can always edit or remove the assignment.
Finish Setting Your Label in Paycove
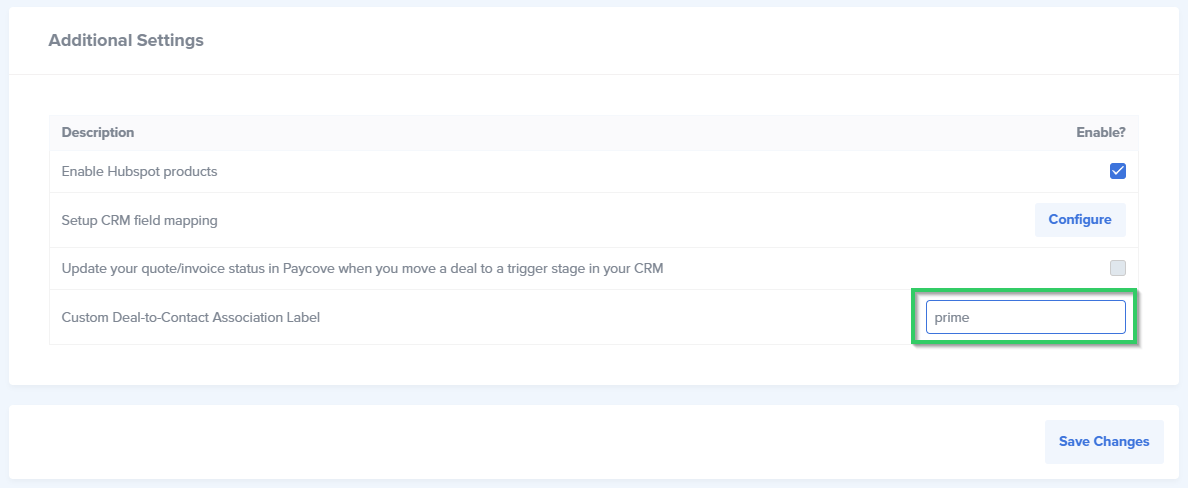
Now, in Paycove, navigate to the CRM Settings page in Paycove. Scroll down to the Additional Settings section and look for the line titled "Custom Deal-to-Contact Association Label."
The phrase should only need to be entered once, and it will apply to all quotes/invoices in Paycove. You can always come back and change the label later if needed, as long as you update it in HubSpot as well. Be sure to save when you're finished.
Finally, create the quote/invoice as you normally would.
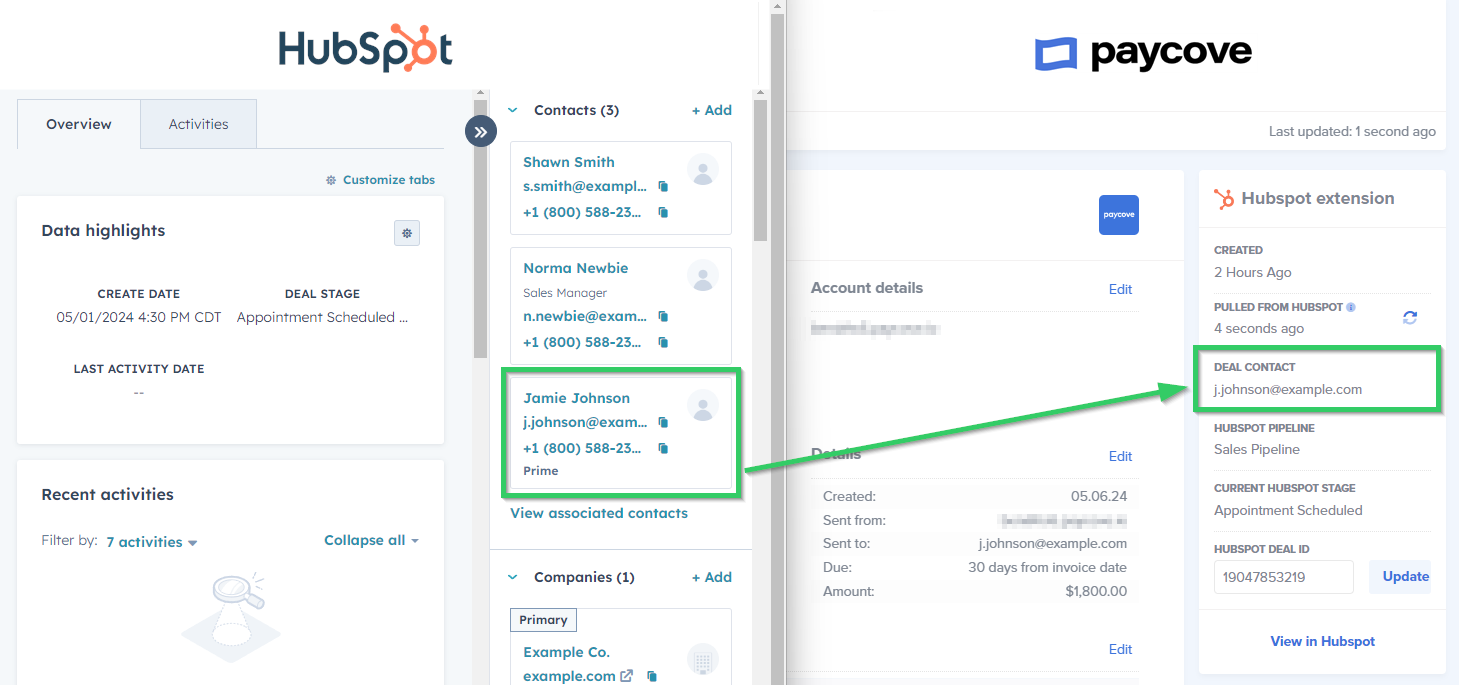
Final Result
Note: At the time of writing this article, the association labels feature is only available to HubSpot users on the Sales Hub Professional plan or Sales Hub Enterprise plan. See this article for more information on Sales Hub plans.
Check out this HubSpot article to learn more about creating new association labels.
Feel free to reach out to us at support@paycove.io for more assistance!