Give your quotes and invoices a more custom, true-to-your-brand look by including a "cover letter" section. A cover letter is an area of content that is displayed at the top of your quotes and invoices. You create the letter within a template, and you can add stylized text, images, branded colors, and tables, as well as custom code. (Check out this video for more help on editing templates.) See the example cover letter below and start dreaming up your own design.
Note: The cover letter feature is currently in beta, so reach out to us at support@paycove.io if you'd like access to it!
Creating a Cover Letter
Navigate to Settings > Templates and open the template to which you would like to add a cover letter. The Cover Letter section will be near the top of the page. Click Edit to start working on your cover letter.

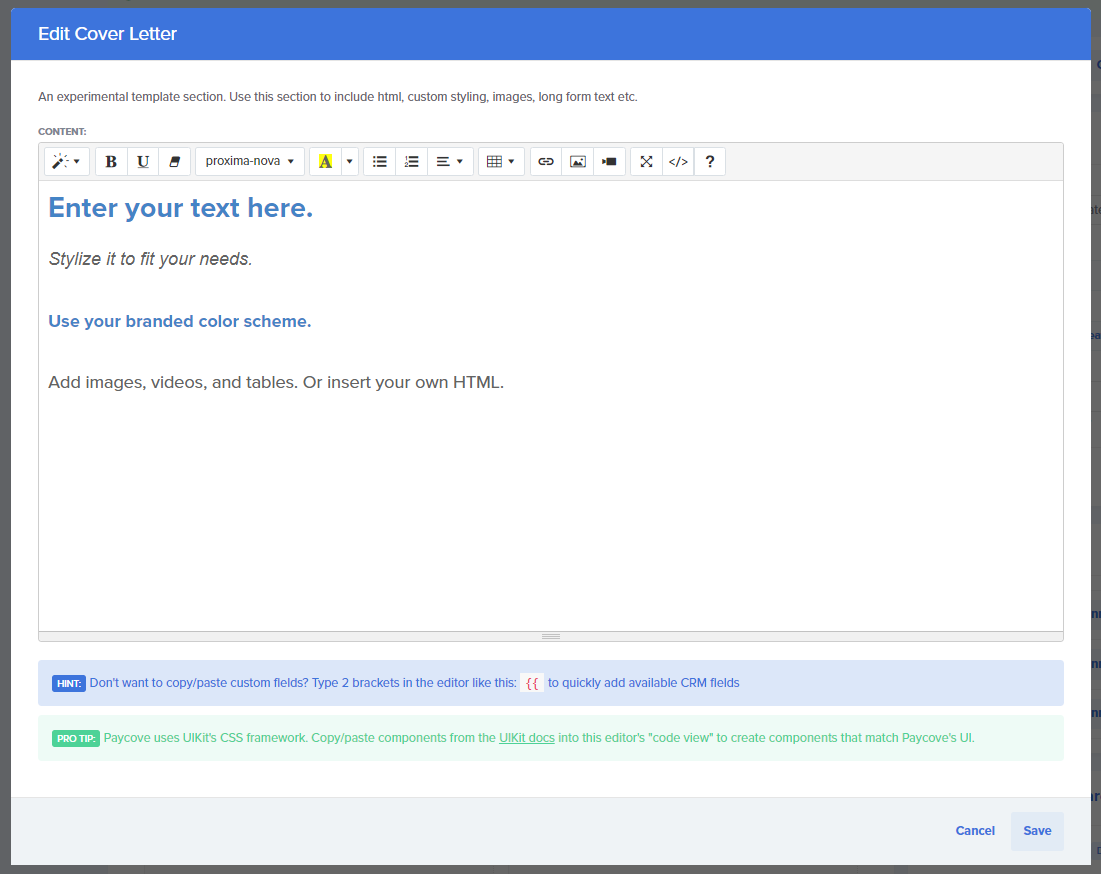
A modal will open. This is where you will create and edit your cover letter. Note the different options below. The buttons indicate text styling options, removing styling, Font Family, Color, various list and paragraph options, Table, Link, Picture, Video, Full Screen, Code View, and Help. (We will talk about Code View more later.) Add your content, and click Save when you're finished.
Experiment on your own in the Templates section once you have access to the feature.
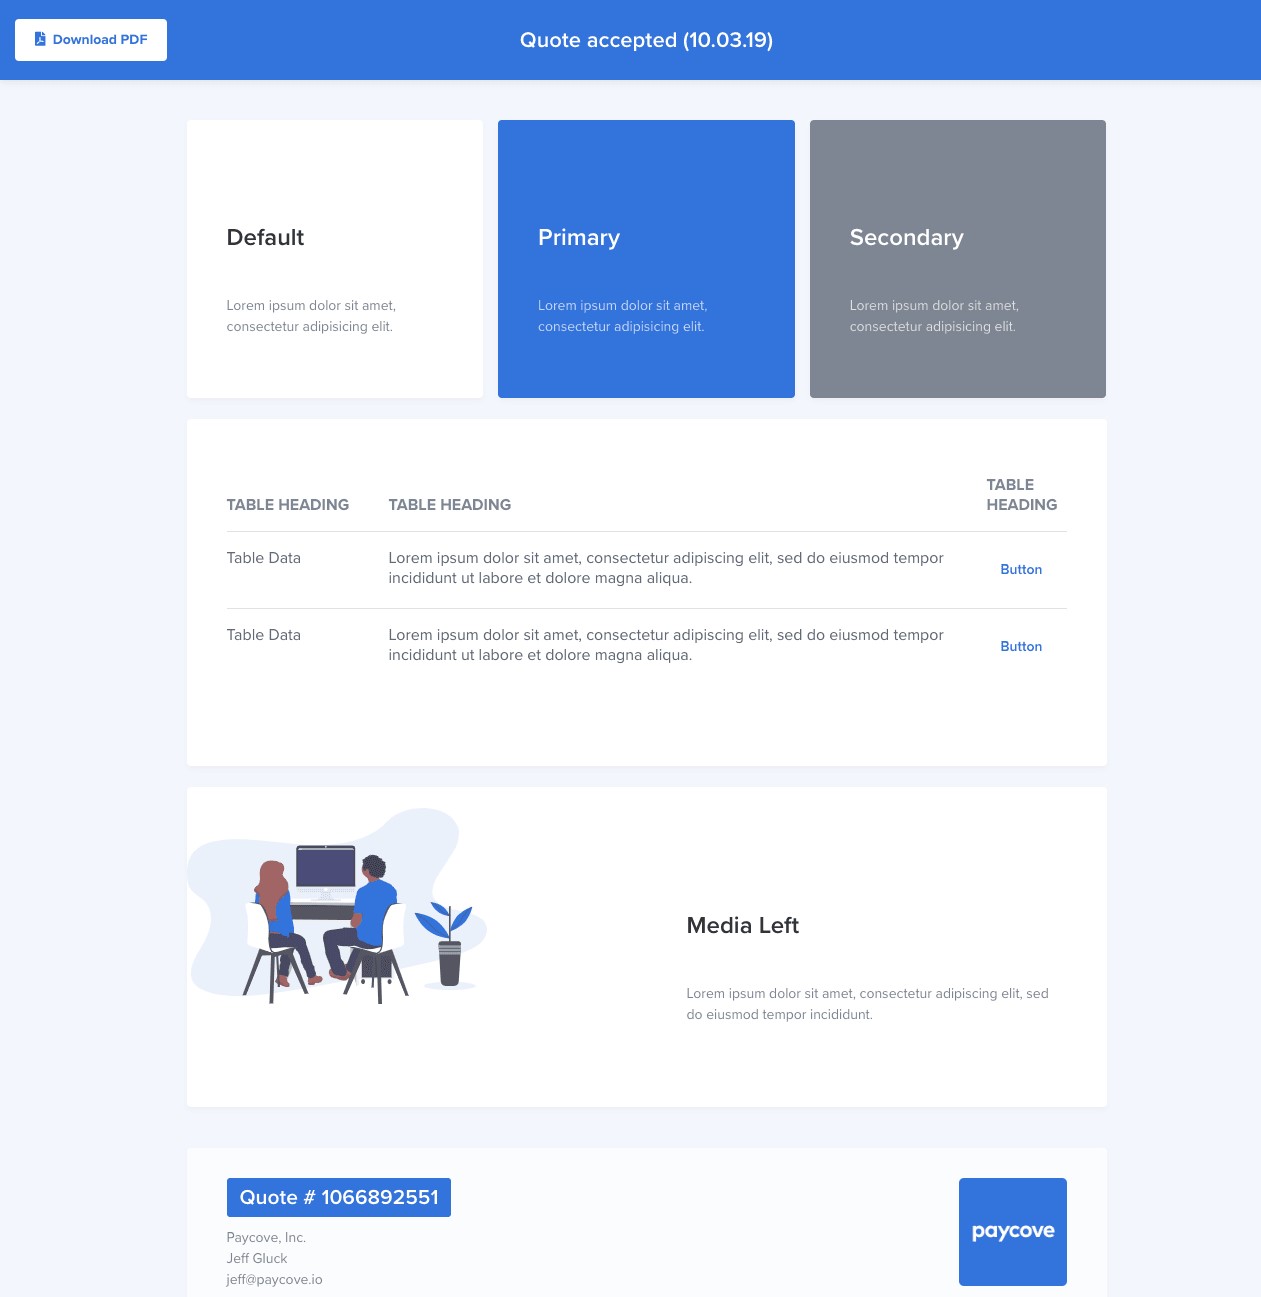
Customer View of Cover Letter
To see what your cover letter looks like in the actual quote/invoice, navigate to the Paycove deal in which the cover letter is meant to be displayed. Remember that the cover letter resides in whichever template you've created it in, so be sure that your desired quote/invoice has the correct template applied to it. The letter is displayed at the top, as seen in the image below.

Advanced Styling
The secret to creating a more sophisticated, modern cover letter is through the use of custom HTML code. You don't need to be a programmer to successfully add custom styling components. You do need to have a keen eye and careful hand though - deleting characters, adding extra characters, and typing in the wrong place can all cause code to display incorrectly. We are now going to discuss adding style components using HTML in your Paycove deals.
Note: If you or a team member are confident in their HTML skills, or if you have a web developer on your team: Feel free to skip the rest of this tutorial and go straight to the UIkit Framework Docs to learn about the classes you can use, all of which are already loaded into our system. You can also use your own custom inline CSS styling.
Code View
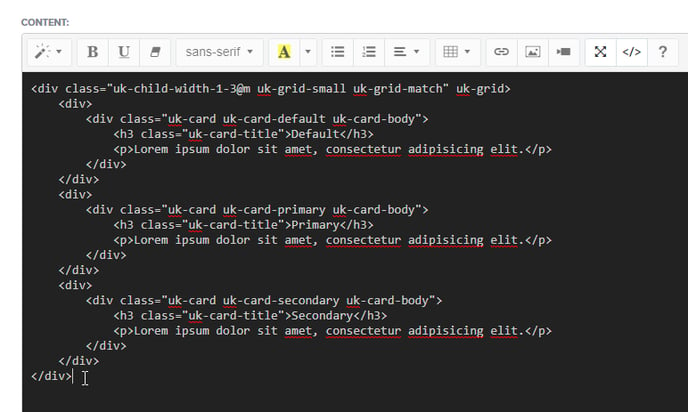
Remember the Code View button mentioned earlier? We are going to talk about that now. Go back into the cover letter editor. Click the </> symbol for Code View. The field will become black, meaning you are now viewing the cover letter in code.

Code View shows the actual HTML code that makes up the content in your cover letter. You can toggle between this view and the regular view at any time.
Adding an Advanced Styling Component: Cards
To prevent keeping you here all day, we are going to walk through adding one component only: a group of stylized text boxes known as "cards." This is one of our favorite additions from a design standpoint. The process of adding cards is the same as the process for adding any other HTML styling component, so once you know how to do this, you can use the same workflow to add more to your quotes and invoices.
 The source where we are going to obtain our code is called getuikit.com. This is a great website where you can find all sorts of code that is already loaded into Paycove's system. Here is the page where you'll find the code for the cards we're going to add: https://getuikit.com/docs/card.
For your convenience, you may also copy the code below instead of visiting the website. Copy this exact code:
<div class="uk-child-width-1-3@m uk-grid-small uk-grid-match" uk-grid>
    <div>
        <div class="uk-card uk-card-default uk-card-body">
            <h3 class="uk-card-title">Default</h3>
            <p>Lorem ipsum dolor sit amet, consectetur adipisicing elit.</p>
        </div>
    </div>
    <div>
        <div class="uk-card uk-card-primary uk-card-body">
            <h3 class="uk-card-title">Primary</h3>
            <p>Lorem ipsum dolor sit amet, consectetur adipisicing elit.</p>
        </div>
    </div>
    <div>
        <div class="uk-card uk-card-secondary uk-card-body">
            <h3 class="uk-card-title">Secondary</h3>
            <p>Lorem ipsum dolor sit amet, consectetur adipisicing elit.</p>
        </div>
    </div>
</div>
Next, paste it into the cover letter editor while in Code View.
You can now toggle to regular view and see what the cards will look like. You'll see that the Lorem ipsum filler text is still in place. You can locate this in Code View and change it there. Again, make sure to not change a single character other than the text itself. Deleting a single "<p>" would cause the whole section to display incorrectly. Make your changes and save.
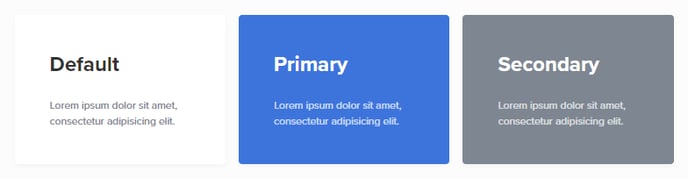
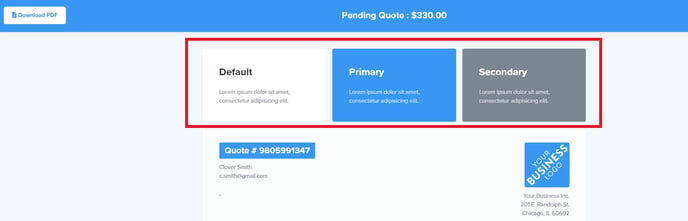
Customer View
You can now view your work on the quote or invoice itself. If done correctly, you will see three different colored cards cleanly placed side by side with the text you've entered in them. Just like any other section of a template, you can go back and edit these at any time.
Visit https://getuikit.com/docs/introduction and check out their list of components to see what else you can add to your quotes and invoices.