E-signatures prompt customers to electronically sign their name before the quote is accepted. If an e-signature has been entered on a quote, you can display their signature on the invoice by using {{deal.signatory}} anywhere on your invoice template. This e-signature satisfies signatory requirements in many jurisdictions, but please check with your specific laws to make sure your team is compliant.
Setting Up E-Signatures
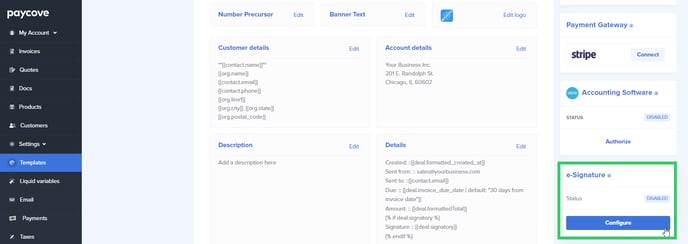
Edit a template by going to Settings > Templates. On the right side of the template editor, you will see a section labeled e-Signature. Click the Configure button.

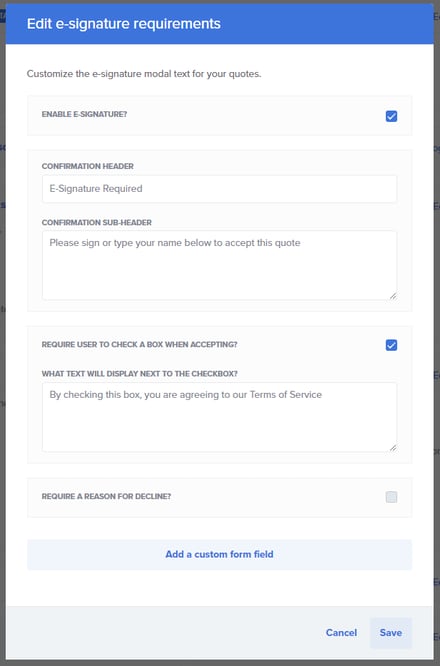
A modal will appear, and you should check the box to enable e-signatures. Here you can write the confirmation text your customers will see, and choose to have them either check a box to accept or write a reason for declining. By adding custom response fields, you can ask for additional information along with the e-signature and choose to have responses automatically save to your CRM. We've entered some example text in the image shown below.

In the default template, the e-signature will appear in the Details section. You can move the e-signature by typing {{deal.signatory}} on any field of your template. Be sure to save when you're finished.
Customer View
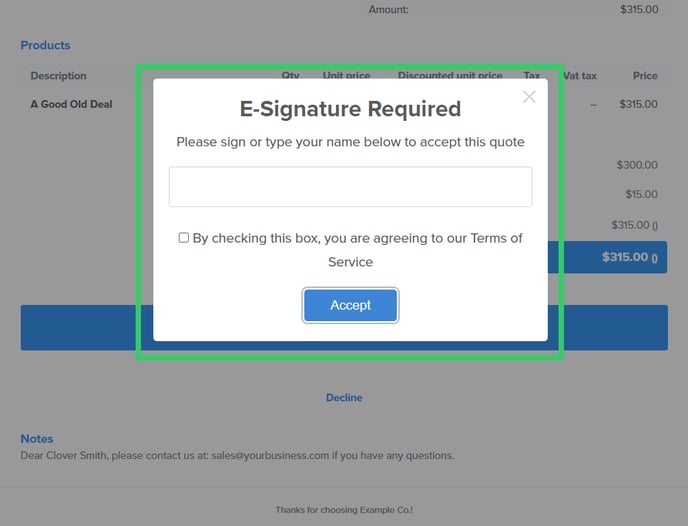
Below is what the customer will see when they click the Accept button on the quote. This uses the same text from our example. After they sign and click the button here, the quote will be officially accepted. This is the point where an invoice will be generated, based on your Paycove configuration.

Viewing Signature in a PDF Download
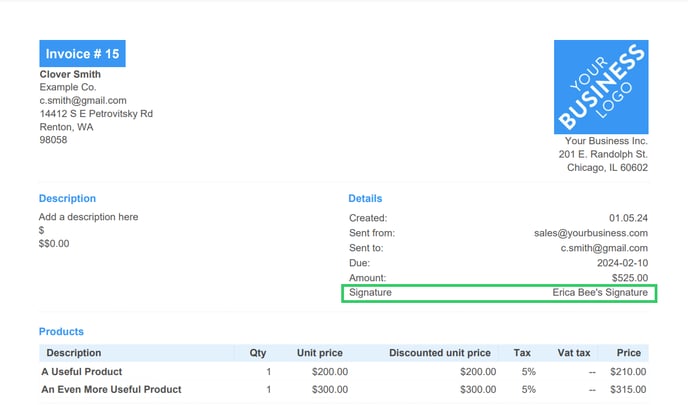
After your customer has signed a quote, you can later see evidence of this if you choose to download the associated invoice. (See this article for more information on downloading quotes/invoices.) It can be found here in the PDF version of the invoice.

We recommend trying out e-signatures for yourself to get a sense the flow that your customers will experience! If you have any questions, feel free to contact us at support@paycove.io.