Wire transfers, also known as bank transfers, are one of the various methods that you can use to accept payment from your customers. They are a safe and reliable option often appropriate for larger transactions.
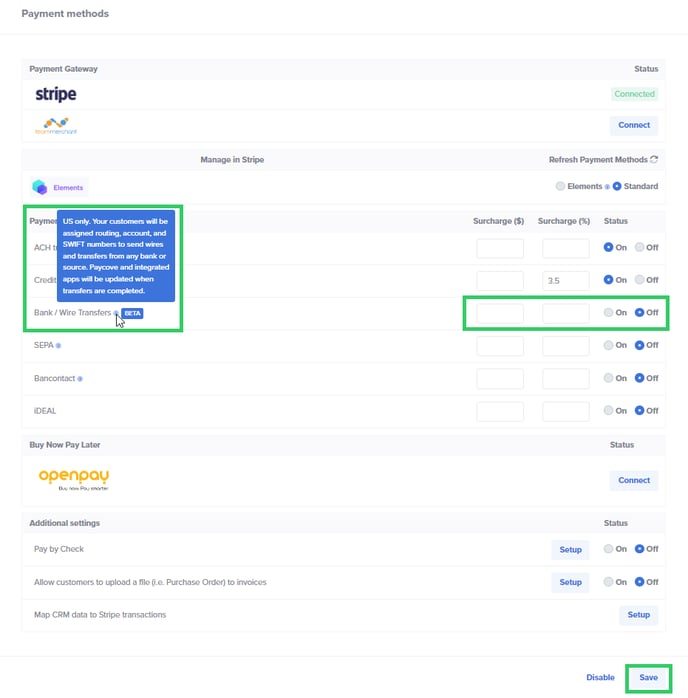
How they work: If you choose to use them, your customers will be assigned routing, account, and SWIFT numbers to send transfers from any bank or source. In turn, Paycove and integrated apps will be updated when transfers are completed. Please read on for a tutorial on setting up wire/bank transfers in Paycove.
Note: Our wire/bank transfer feature is in beta, and is currently only available within the U.S.
Enable Wire Transfers on the Account Level
First, go to Settings > Payments and confirm that you're connected to a payment gateway (Stripe, in this example). Next, make sure wire transfers are set to On. In the fields here, you can set a surcharge in dollars or percentage. Remember that you can always opt to override these surcharges later in an individual quote/invoice. Click Save when you're done.
 Enable Wire Transfers on the Template Level
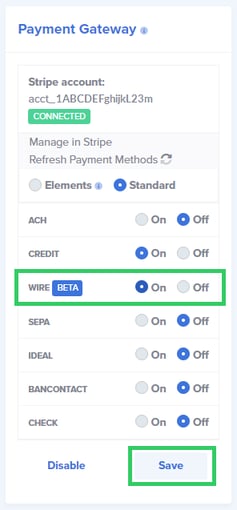
The next step is to open any template where you'd like wire transfers to be enabled. In your desired template, look for the Payment Gateway panel on the right side of the page, and set Wire (Beta) to On. Then click Save. Note that this panel is also where you can see the full number of the connected Stripe account. Clicking the Manage in Stripe text at the top of the panel will take you to Stripe, if needed.
 Customer View
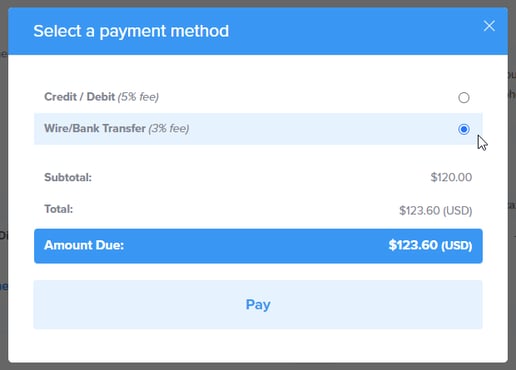
When your customer opens an invoice and clicks Pay, the modal will now display Wire/Bank Transfer as one of the payment method options. It will show any fee that you've attached to it, which will be reflected in the total.
If you have any questions on wire/bank transfers that weren't covered in this article, feel free to reach out to us at support@paycove.io for more assistance!