Getting Started - Authenticating Your Xero Application
First thing's first. You will need to grant Paycove permission to interact with your Xero account. You can sync quotes and invoices with your Xero account at two different levels:
Account Level
All your Xero invoices and payments will send to one single Xero account. This is an easy setup for businesses who keep their accounting under one roof and one Xero license. You can connect by logging in to Paycove and locating it in the Settings > Integrations page.
Template Level
Paycove quotes or invoices will be sent to the Xero account associated with each template. This is a great tool for those businesses that manage multiple entities, or need to keep their finances housed under different licenses. You can enable this from the Settings > Template page.
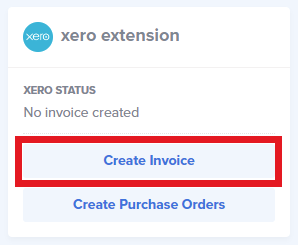
Step 1 - Create a Xero Invoice
Creating invoices in Xero can be done in one of three ways:
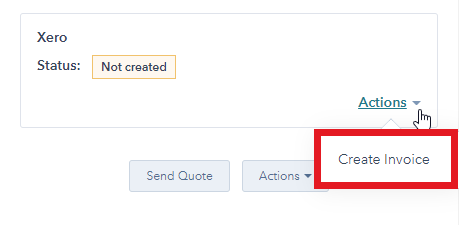
- Once you've generated an invoice inside of Paycove, (and you have authenticated your account), you can click "Create Invoice" from the Xero extension module.
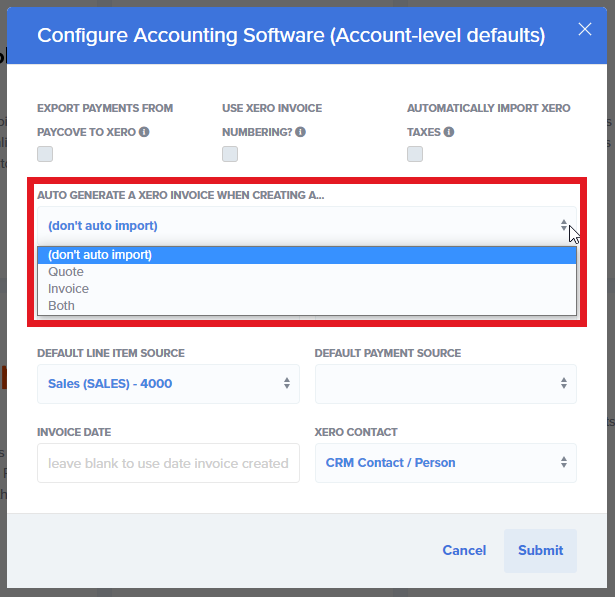
- Alternatively, you may configure Paycove to automatically generate a new Xero invoice each time a new Paycove quote or invoice is created. This can be found under Settings > Integrations. Click Configure and select your desired automation settings.
- For our HubSpot users, you can take advantage of our Paycove extension to manage your Xero invoices. From here, you can create, read, and delete an invoice without having to leave HubSpot.
Regardless of which way you generate the invoice, Paycove will send to Xero the following data:
Invoice Number
By default, Paycove will use the quote or deal's number when generating the quote. If the Xero invoice would have a duplicate number, Paycove adds "duplicate" indicator to the end of the invoice number in order to avoid an error from Xero.Line-Items
This includes (but is not limited to) discounts, quantity, description, and taxes.Customer
If there is no matching customer between Xero and Paycove, Paycove will generate a new customer using many of the customer details we have. However, if Paycove has already created this customer, we will associate the invoice with the existing Xero customer.Step 2 - Configuring the Invoice
When generating a Xero invoice, you will likely have preferences for how the invoice is created. From the Xero Management modal, you can specify the:
- Default tax code,
- Default invoice status,
- Line-item source, and
- Payment source
This configuration can apply at either an Account level, or Template level, depending on your needs.
Step 3 - Handling Taxes
To ensure the Paycove invoice you present your client matches the Xero invoice, you may want to set your default taxes in Paycove to match the default taxes in Xero. For example, if you set your default line-item taxes in Xero to use the "INPUT" code, with a 9.25% value, you should also set your account-level or template-level taxes to be 9.25%.
What if I have a product that is non-taxable?
When you navigate to Products from inside Paycove, we list your pulled in CRM products or native Paycove products.
From here, set your non-taxable products to have a tax rate of 0%.
Note: Line-items created using this product will automatically have a NONTAXABLE code applied when generated inside Xero.
What if I need to further adjust our taxes?
If you need to provide a specific rate other than the default, you may update the line-item tax from within Xero, then also update the line-item tax from within Paycove.
Step 4 - Updating Xero Invoices
Should you need to change a line-item or invoice detail once created on Xero, you may click the "sync" buttonfrom inside of Paycove's Xero module.
Note: If your Xero invoice is set to AUTHORIZED, or is not able to be updated for some reason, we will notify you via a warning from inside of Paycove.
Step 5 - Accepting Payments
Once an invoice is paid inside of Paycove, you will be able to add this payment to the corresponding Xero invoice in one of two ways:
- Paycove will generate a "charge" from within the admin panel. You may click "Send to Xero", and the payment will be logged in the invoice.
- Or, if you prefer, you can enable the ability to automatically log payments in Xero once a charge is made by your customer.
If for some reason, a payment fails to transfer from Paycove to Xero, we will notify your team via email and note this failure in the invoice's history. The most common reason a payment will fail to transfer is because the amount is great than the amount due on the Xero invoice.
Note: even if a payment fails to transfer to Xero, the charge will still be created on Paycove, and the money will be transferred. We notify your team of the failed transfer so you can update your records on Xero accordingly.
Step 6 - Profit!
Thank you from the Paycove team for using our integration with Xero. Please reach out to us at support@paycove.io if you have any questions or feedback.