Would you like certain data from Paycove to be displayed in your CRM? You can customize which Paycove data is shown in your CRM by using Paycove's CRM mapping feature. This feature allows you to create and fill custom fields in your CRM, containing quote and invoice data from Paycove. You can have all kinds of data be pushed to your CRM, including relevant dates, times, addresses, and e-signatures.
Note: Keep in mind that this article describes how to push data from Paycove into your CRM. If you would like to know how to pull CRM data into Paycove, read this article or watch this video.
Locating CRM Mapping
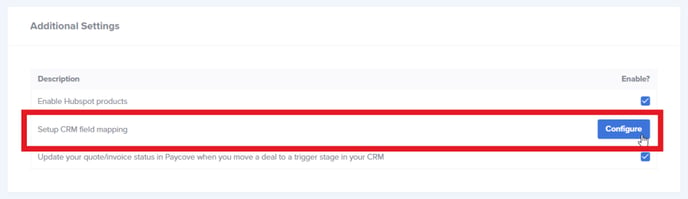
To begin, log in to Paycove and go to Settings > CRM Settings. Then scroll down to Additional Settings and click the Configure button next to Setup CRM field mapping.
Configuring CRM Mapping
Clicking the configure button will open a modal that shows your existing fields. (Existing fields refer to the properties that are already being displayed by Paycove in your CRM.) Within this modal, you can now configure your CRM mapping. You can add, delete, or modify fields here. In this example, we are going to add a new property. Click Add a new field. 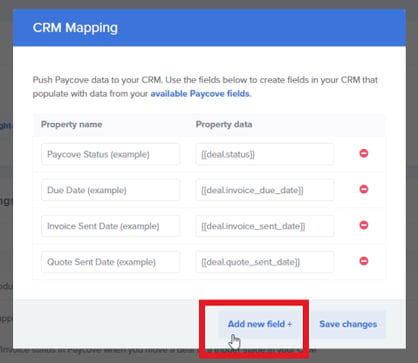
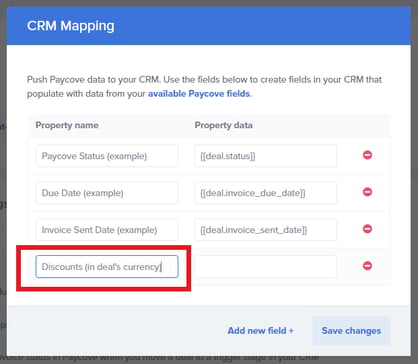
You can create a Property name here. In this example, we're going to add a property that shows a discount on a deal, so we'll create a relevant name.
In the Property data field, type in the Liquid variable for the data that you would like to be displayed in your CRM.
Note: In this context, you can think of Liquid variables as "code words" that Paycove and your CRM use to display certain types of data. It's handy for data that changes, such as names and dates. For instance, if you wanted to display the date that a quote was created, you would copy and paste "{{deal.quote_created_at}}" instead of manually typing in the date for every deal.
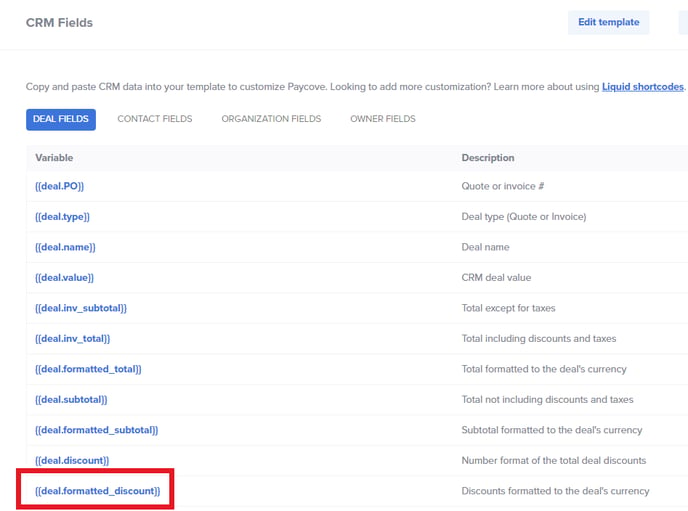
You'll need to be logged in to Paycove to view the complete list of available Paycove fields. This is where you'll get your Liquid variable for whatever you'd like to add.
Copy the data you'd like to use from the Paycove fields list. In this case, it's a deal's discount.
Next, return to the CRM mapping modal and paste the data into the property data field.
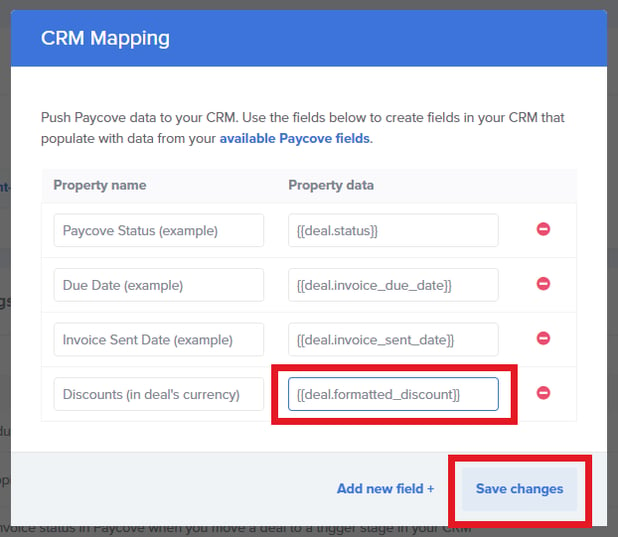
Finally, click Save changes.
Viewing Your Changes
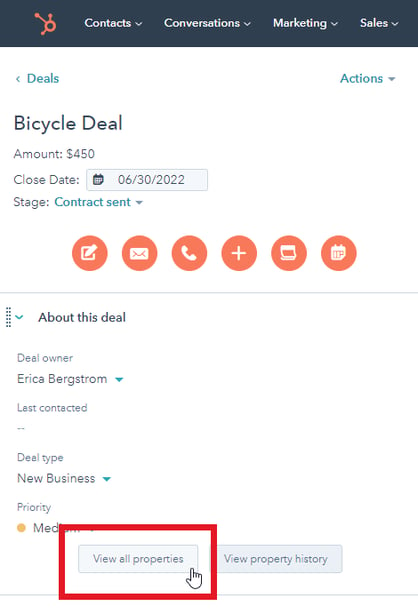
Now you can view the new property you've created in your CRM. Data added in Paycove using CRM mapping will create properties in your CRM populated with the deal's corresponding data. We'll view the new property through HubSpot in this example, so be aware that things will look different in other CRMs.
In HubSpot, open a deal and navigate to the About this deal section. Click View all properties to see all your properties, in addition to the new one you've created.
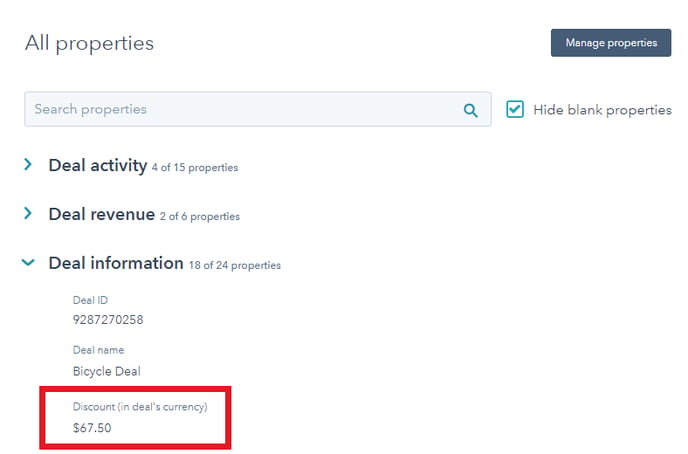
You may need to scroll down to view your new property, depending on what you've added. In this case, it can be viewed under Deal information. Note that you can search for properties as well.
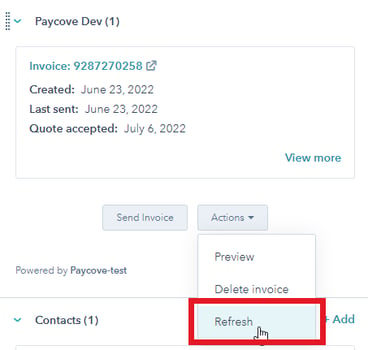
You may need to refresh/resync the deal in your CRM for the changes to show up. Whether or not you would need to refresh is explained in more detail below.
Properties can be added, removed, and modified in Paycove at any time using CRM mapping.
When Are These Values Pushed to Your CRM?
- Refresh from CRM (either bulk sync, or from deal detail page)
- Checkout page viewed by customer
- When quote or invoice is created
- Invoice partially or fully paid
- Invoice marked paid / unpaid
- Bank transfer started / failed / succeeded
- Quote accepted / rejected
- Editing scheduled payments
- Scheduled payment marked paid / unpaid or auto recalculated
- Customer emailed from Paycove
For additional questions regarding custom field mapping, check out our other support articles or contact us at support@paycove.io!