Thank you for your interest in Paycove! We're excited to help you get started. To show you the fundamentals, we've put together a basic walkthrough on creating and sending quotes and invoices.
If you are more of an audio-visual learner, then check out our tutorial video below. We’ve made some changes in terms of functionality and appearance since this video was made, but we still consider it a good general setup guide. You may be able to skip some of the early steps if you've already integrated Paycove with HubSpot!
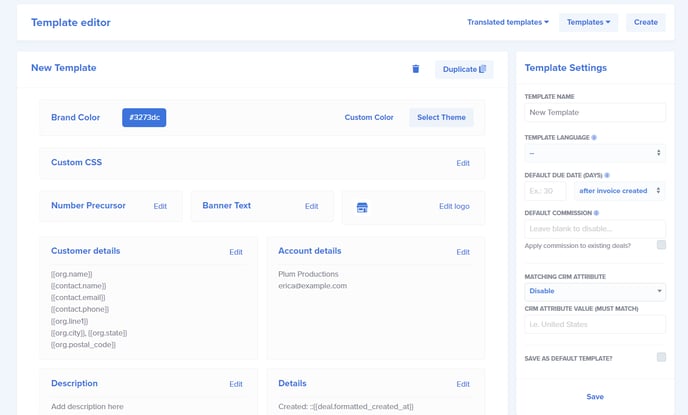
Setting Up Your Template
We'll start this walkthrough by bringing up templates (found under Settings > Templates) since the template dictates the content and appearance of any quote or invoice that uses that template. We won't go in-depth with templates in this article, since this is meant to be an introduction to creating and sending invoices. We do want you to know their importance though. If you want to learn more about setting up templates, check out this video.
Creating a Deal
Once your template is set up, you’ll create the deal in HubSpot. We are going to use HubSpot for our examples in this article. Make sure you include the necessary details, as shown in the gif below. In this example, I’ve left a lot of the default information as-is, such as the Pipeline and Deal Stage. Leave the Amount field blank, since you are instead going to add a product or products to your deal.
For the Associate Deal with section, be sure to add a contact and company here, or you may get an error in Paycove. (Paycove needs to know who the deal is associated with.)
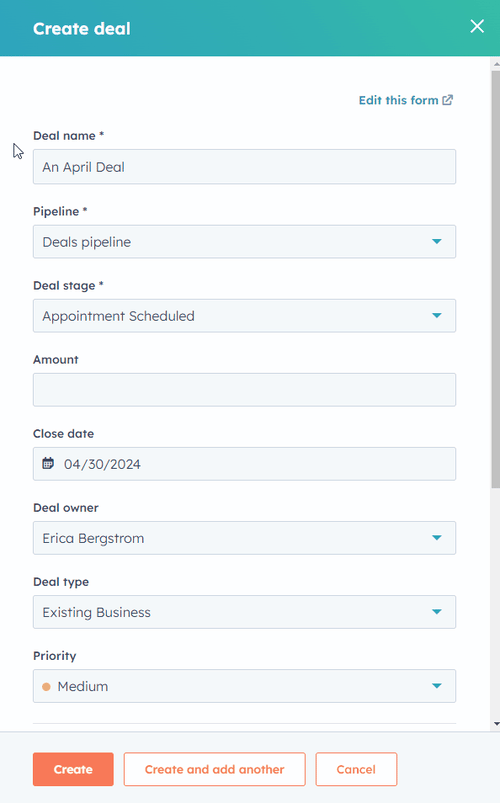
Now, add a line item. You can choose one from the dropdown, or click Manage product library if you need to add/edit an item. Click Create when you're done, and the deal will be created.
Creating a Quote
Creating Individual Quotes
Now, depending on your pipeline settings, a quote may have been automatically created in Paycove as soon as you clicked the Create button a moment ago. In this article's example, the Create Quote Stage is set to Appointment Scheduled. (Remember this from the GIF?) That means a quote was automatically generated, since the deal is in the Appointment Scheduled stage in HubSpot.
 You can adjust your pipeline settings on the CRM settings page in Paycove to control if and how automation occurs. Seen below are the settings in our example. Here's an article on pipelines and trigger stages if you'd like to learn more.
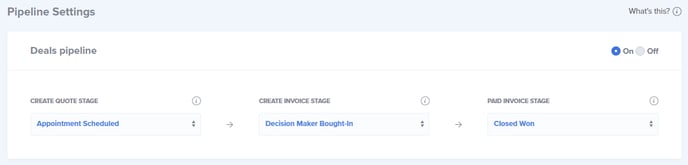
Alternatively, if you don't want to use automation, you can just turn off pipelines and manually create your quotes and invoices in HubSpot as shown below.

Bulk Importing Deals
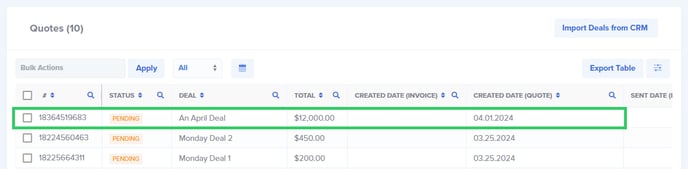
If you have a large number of existing deals that you'd like to create quotes for, you can do so in Paycove's Quotes page. Simply click the Import Deals from CRM button, and then refresh the page after a few moments. This can save you a lot of time!

Sending a Quote
Reviewing Your Quote As Needed
Once your quote has been created, you can review it in Paycove on the Quotes page.
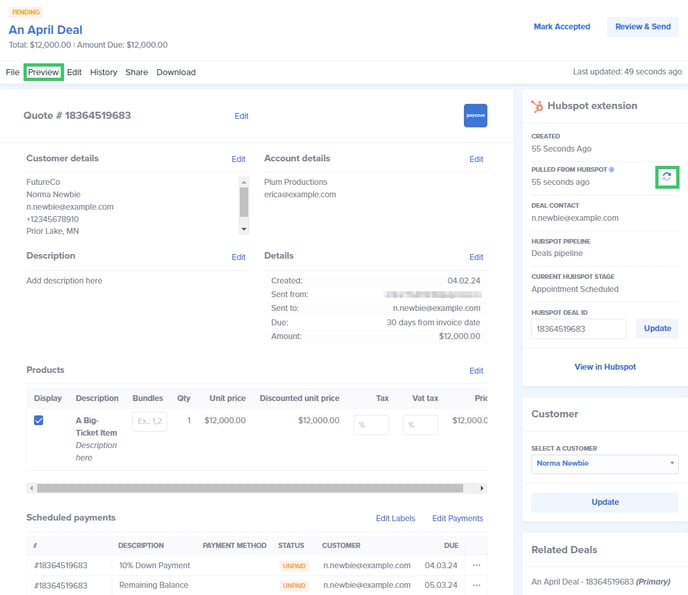
Click the quote to open it. You can make sure the information is correct, and you can Edit different sections and labels as needed. If the associated template was set up correctly, you may not need to edit anything. You may click Preview at the top to see what the quote will look like from the customer's POV. If you make any changes to the deal later in HubSpot, you can click the Refresh button seen on the top right.
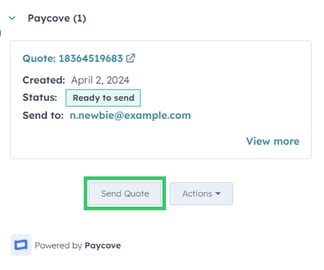
Once everything is set, you can send the quote in either HubSpot or Paycove. We'll briefly go over both ways. Note that quotes and invoices send in an email format.
Sending a Quote via HubSpot
Simply click the Send Quote button in HubSpot's Paycove widget, on the right side of the page.
Sending a Quote via Paycove
In Paycove, click the Review & Send button at the top right of the quote.

This will cause the email modal to open, which allows you to make any last-minute changes to the email that the quote will be sent as. (We recommend that you set up an email notification template, so you won't have to make constant changes. Learn more about email notifications here.)
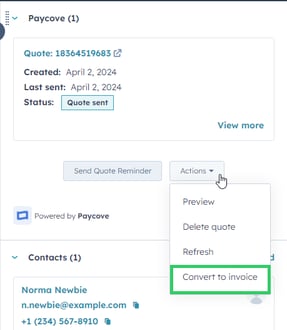
Creating an Invoice
Once your customer has accepted the quote, an invoice may automatically be created, depending on your pipeline settings. If one is not automatically created, you can create one in several ways:
1. Move the deal to the appropriate stage in HubSpot to trigger an invoice to be created, if you have this set up.
2. In HubSpot, click Actions > Convert to Invoice.
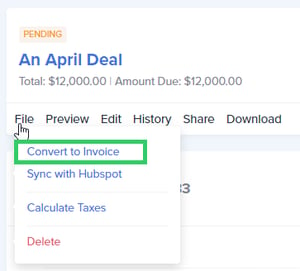
3. In Paycove, click File > Convert to Invoice.
Sending an Invoice
The newly-created invoice will now appear in your Invoice table. You can review it here once again as needed. Overall, the steps you take here are similar to those taken when sending a quote. You can send the invoice in HubSpot using the widget, or you can do so in Paycove by clicking the Review & Send button. This will once again cause the email modal to pop up, where you can make any needed adjustments to the invoice email that the customer will receive.

Monitoring an Invoice's Status
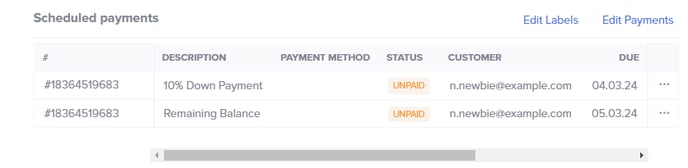
After you've sent the invoice, you can see whether a customer has paid based on the Status shown in the Invoices table, and within the invoice itself. You'll also receive an email when the customer has made a partial or full payment.

You can check the customer's payment activity by looking at the invoice's Scheduled payments section (pictured below), as well as the Activity section below that for a full breakdown.
We hope that this guide will help give you a jump start on invoicing with Paycove! If you have any questions or need further assistance, check out our other help articles or reach out to us at paycove.io, and we'd be glad to help.